Setup wizard
The New Launch Sheet Wizard consists of three steps.
Step 1: General Settings
Per default, your first connected Ad account will be selected and a name based on that will be pre-filled.
Of course, you can manually choose a different Ad account, and change the sheet name as required
Sheet Name
Enter a name for your sheet (e.g., "My Documentation Launch Sheet")
Ad Platform
Select the ad platform (currently only Meta is supported)
Ad Account
Choose an ad account
Asset Source: Choose either GoogleDrive or Dropbox, in order to select your Creative assets in the Launch Sheet. To support teams that don't rely on GDrive and Dropbox, we've built new integrations that natively allow users to select files from these asset storage providers:
Frame v4
Iconik
Frontify
Local Files → Upload assets directly from your device.
Frame is available for all Team & Pro plan customers, Iconik and Frontify are available on request. Reach out to help@kitchn.io or via the chat window. With this update, we've also improved the folder and file selection UX, including being to "select all" assets in a folder.
Main folder
In order to improve asset selection speed, you can optionally set a main folder where all assets belonging to the selected ad account are stored.
Step 2: Configure Default Values
Select which fields and settings will apply to all newly-launched ads. Fields selected here (e.g., Pixel) cannot be edited in the sheet later.
When you get to this step, the settings of the last created ad in your ad account will be automatically pulled in and pre-filled.
Status: Choose whether ads are launched as active or paused.
Tracking:
Pixel: Select a Pixel available to the selected ad account.
URL Params: Set URL parameters for tracking (e.g.,
utm_source=facebookor dynamic parameters likeutm_campaign={{campaign.id}}). You may leave this empty if irrelevant.Offline Conversion Tracking: This feature is available once you create the sheet. You can find it going to the launch sheet settings → Advanced → Tracking.
Identity: Choose a Facebook Page, Instagram Account and Threads Profile (optional).
⚠️ If you are not able to see your facebook page in the dropdown, follow the steps outlined in this article to proceed.
Settings configured in the wizard can now be modified after Sheet creation by accessing Settings in the Launch Sheet.
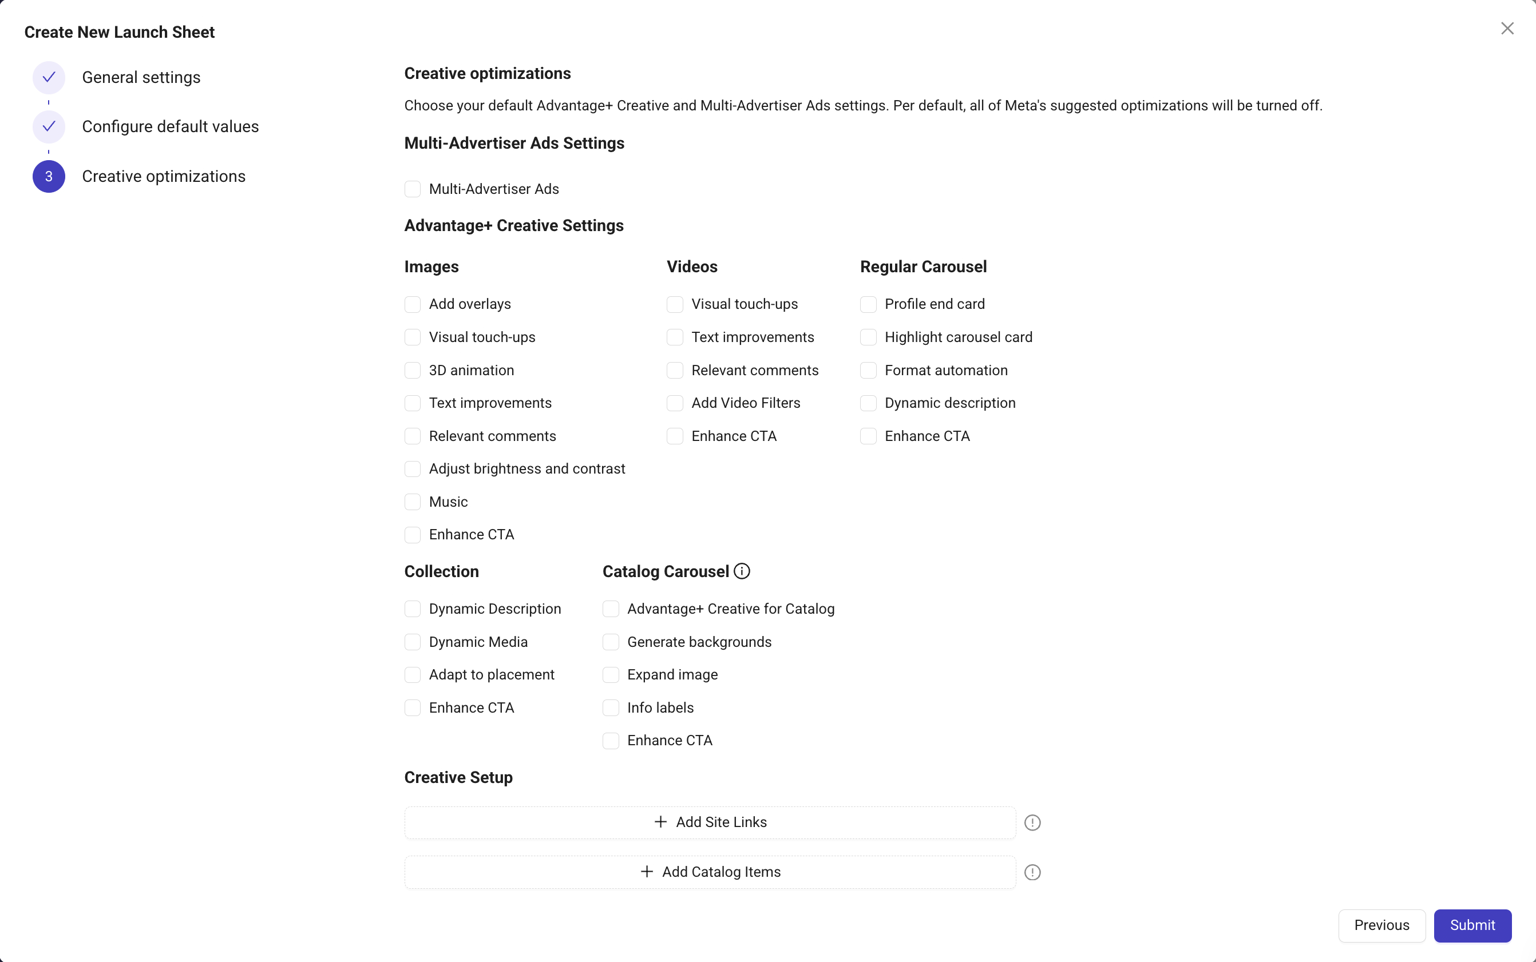
Step 3: Creative Optimizations
Creative Enhancements
Set up your default Advantage+ Creative and Multi-Advertiser Ad settings that will be used for your newly launched ads. Per default, all optimizations are turned off, but you may choose to turn on individual or all settings.
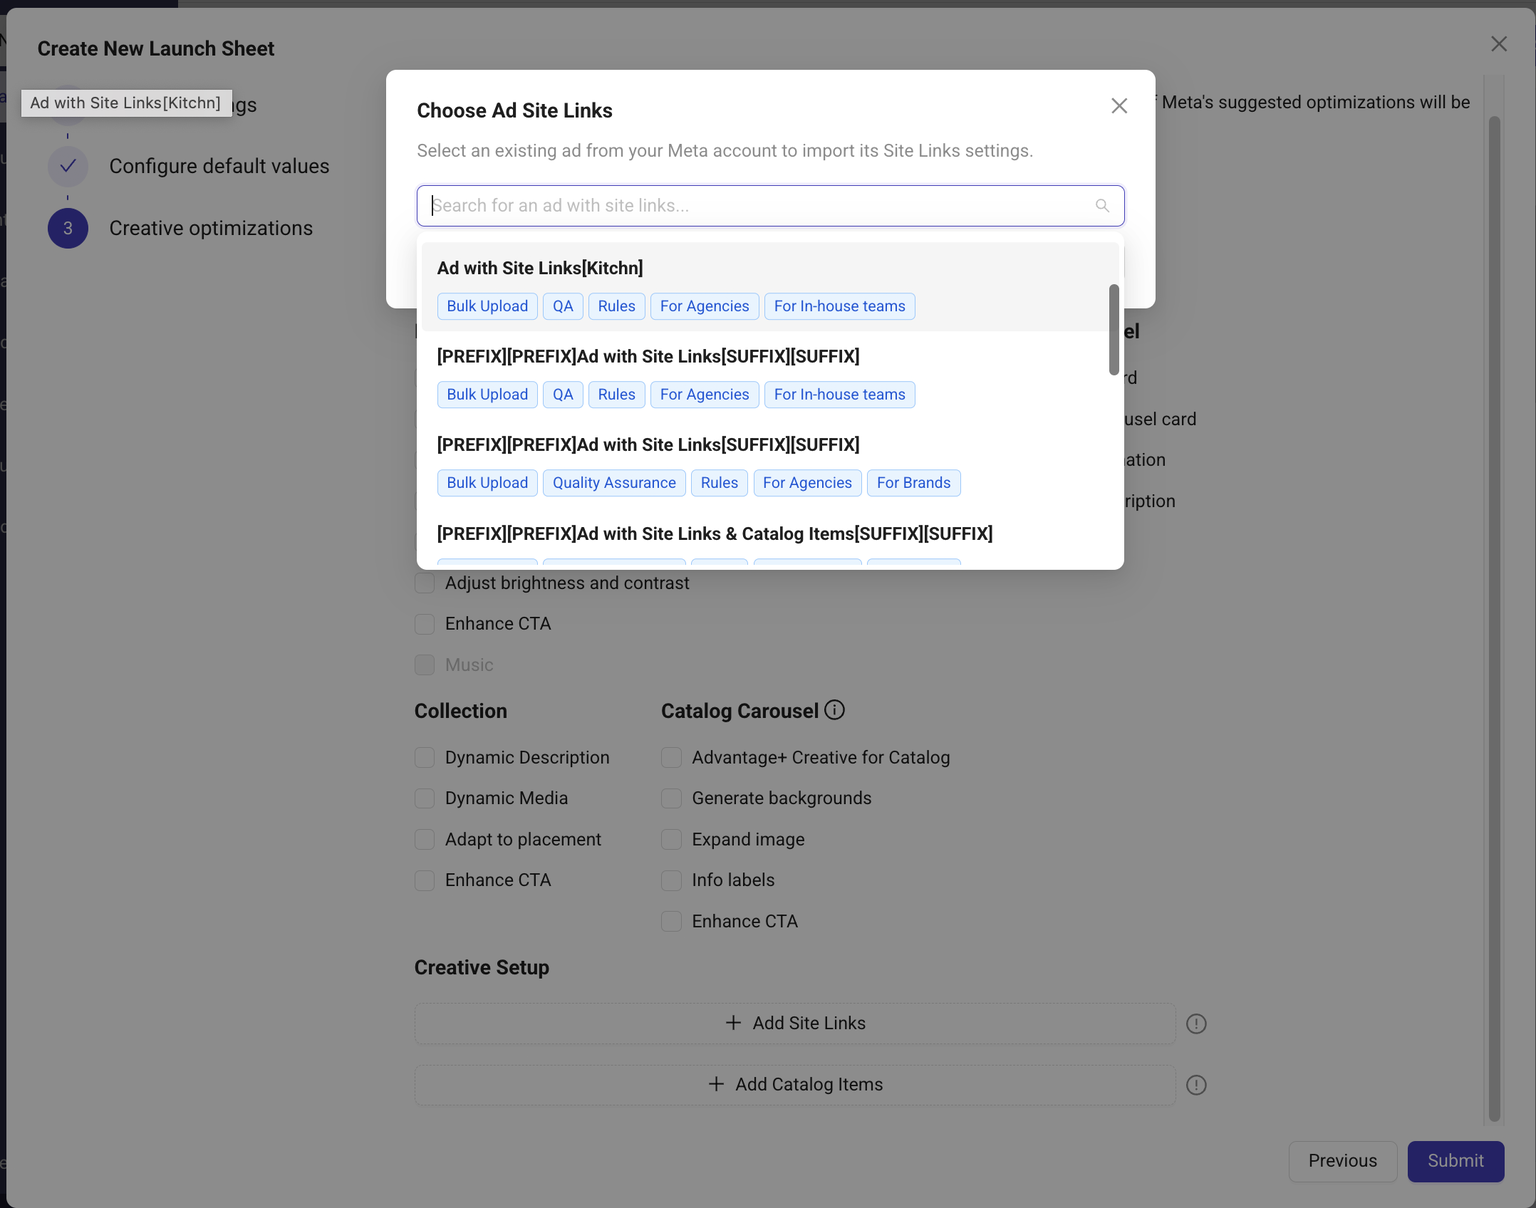
Site Links
You can now add Site Links to all supported ads within a Launch Sheet.

This works by selecting a previous ad with Site Links. Creating Site Links from scratch is currently not supported.
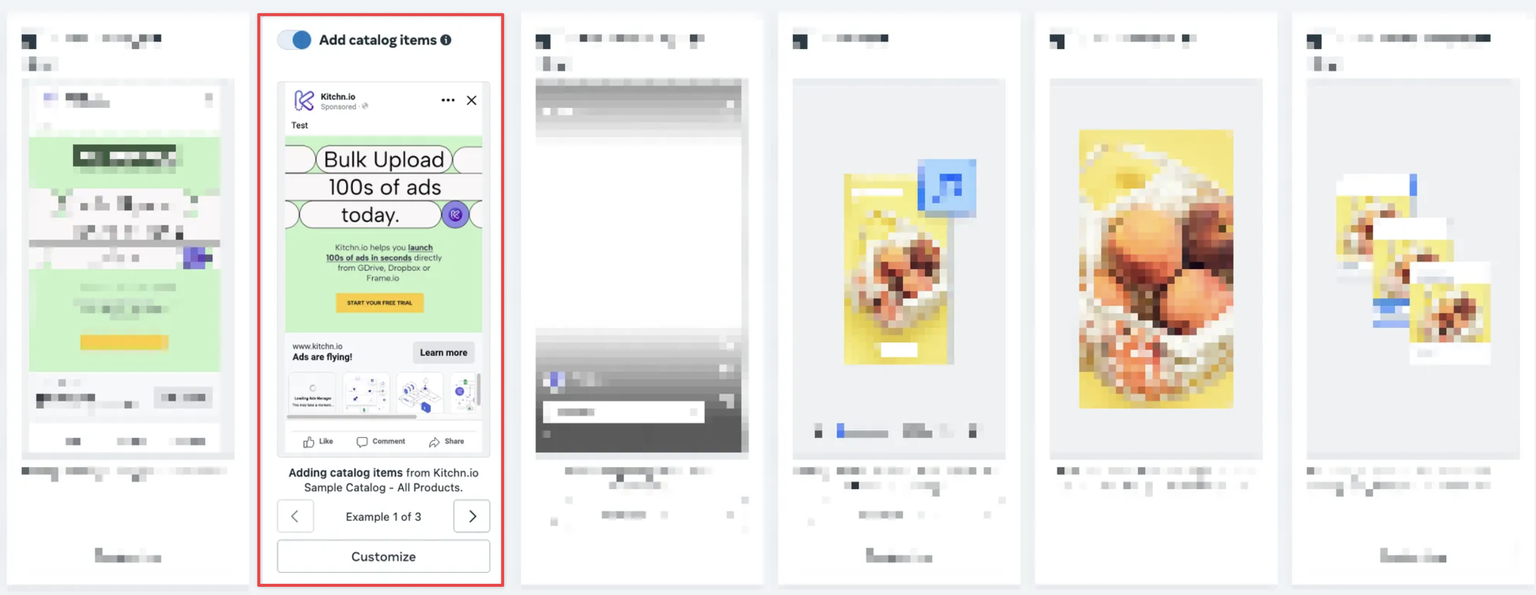
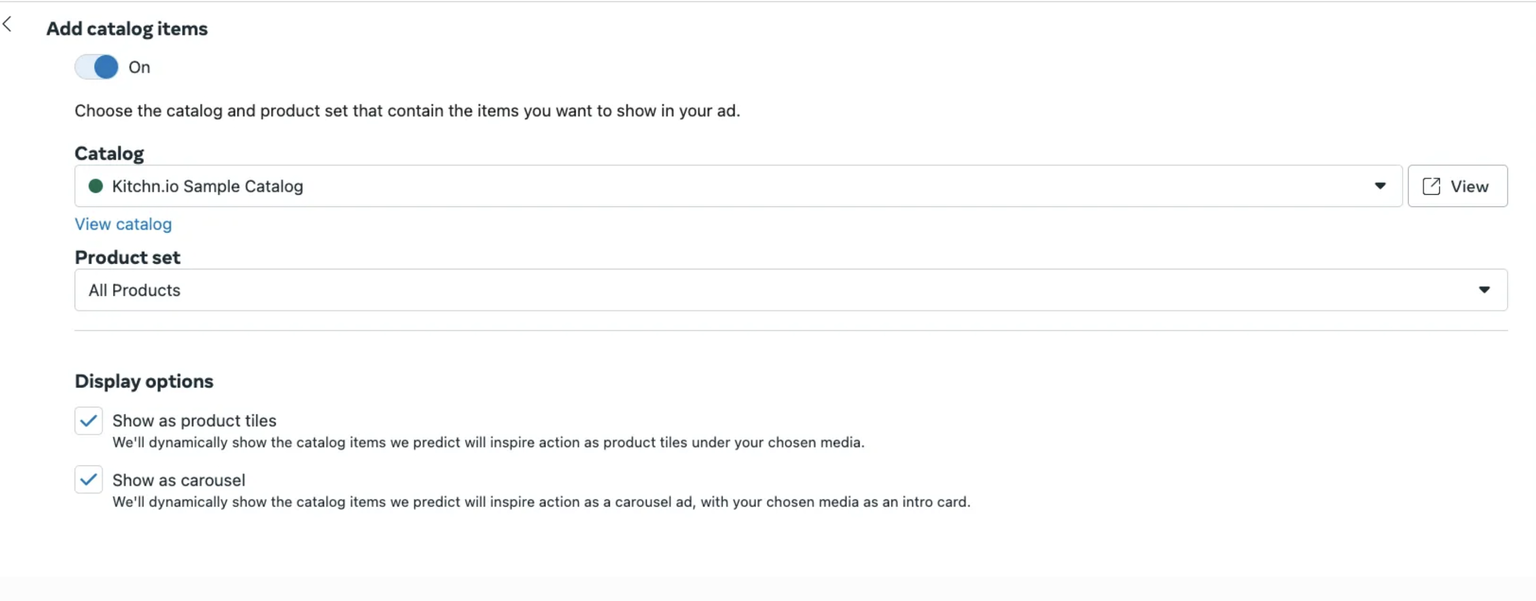
Add Catalog Items
You can Add Catalog Items, which is a Creative Enhancement with an additional setting of the Product Set ID.
The Product Set ID for now has to be entered manually.
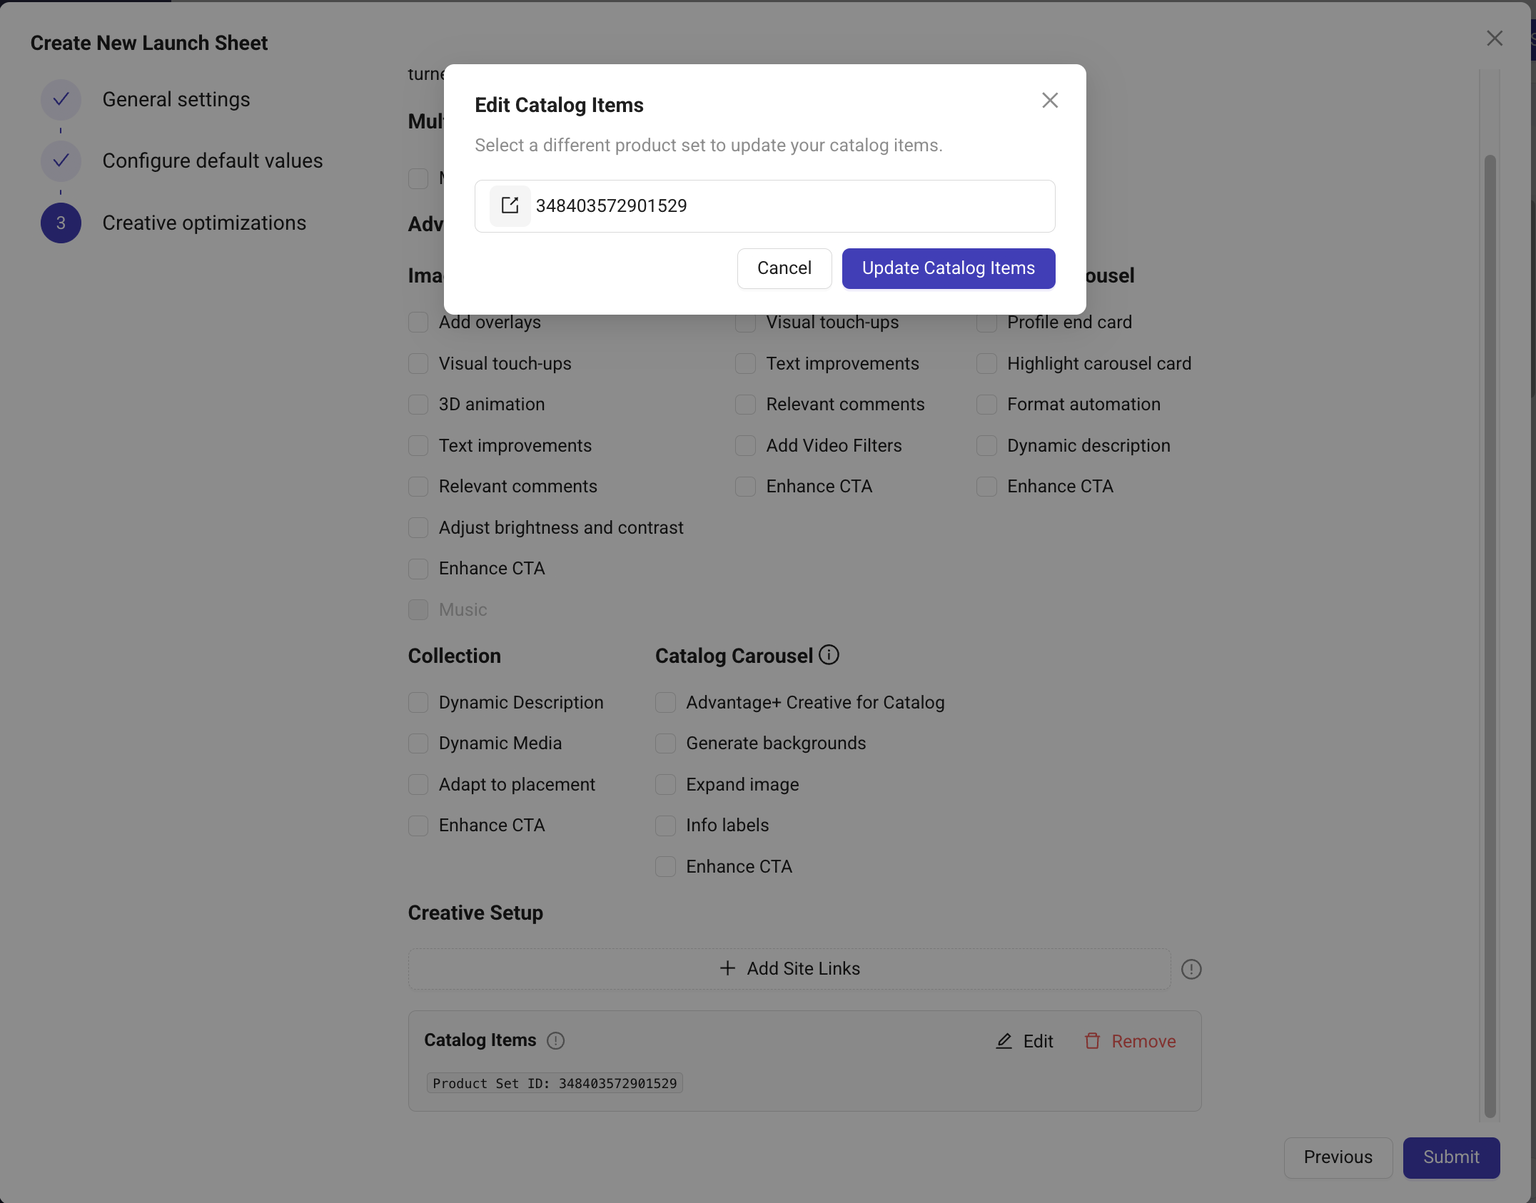
The Display Options are both enabled.
Hit Submit to create your Launch sheet. 🚀